Sprinkler Valve Wiring 101 - Complete Video Tutorial
What You'll Learn
- Basic valve wiring principles and wire color codes
- How to connect common wire vs zone wires
- Proper wire nut connection techniques
Wiring Basics
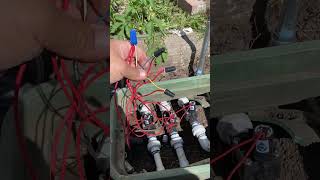
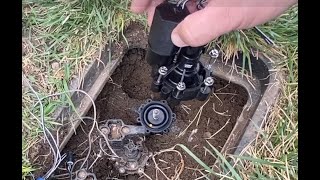
Proper valve wiring is essential for reliable sprinkler system operation. This tutorial covers the fundamentals every homeowner should know.
Wire Types
- Zone Wires: Colored wires that control individual valves
- Common Wire: White wire that completes the circuit (usually)
- 18-Gauge Wire: Standard for residential sprinkler systems
Basic Connection Steps
- Strip 1/2 inch of insulation from each wire
- Connect zone wire to one solenoid terminal
- Connect common wire to the other solenoid terminal
- Use waterproof wire connectors
Pro Tip: Always use grease-filled wire nuts underground. Regular wire nuts will corrode and cause zone failures.
Related Guides
Related Tools
FAQ
What gauge wire should I use?
18-gauge wire is standard for residential systems. For runs over 800 feet, consider 16-gauge or 14-gauge wire to reduce voltage drop.
Does wire color matter?
Not electrically, but using consistent colors helps with troubleshooting. Common practice is white for common wire, colors for zones.
Can I splice underground wires?
Yes, but only with waterproof grease-filled wire nuts or DBY connectors rated for direct burial. Regular wire nuts will fail underground.