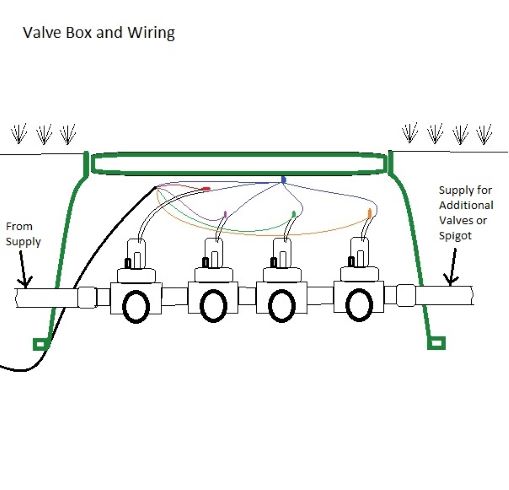
Valve wiring can be simple, but it can also cause problems if not done properly. When wiring valves, use an approved wire designed for sprinkler systems. If you take a closer look at the wire, each strand is color coded to make installation easier. When wiring valves, you need to choose a color to use as your common. The common is generally the white wire, but I have depicted it as Blue in the wiring image, just to make it stand out. As you can see, the common connects to each valve, along with a different color of wire run to each separate valve. When I wire valves, I always start by selecting one wire from each valve and connecting them to the common (there are 2 wires coming out of each valve solenoid, as these wires are connected to a coil / electromagnet, the polarity doesn't matter, so simply select a wire for the common and the other will be used to control the valve). Once you have the common connected, you will have one wire left for each valve. Simply connect a different color wire to each valve. The color doesn't matter, but I always stick to a color code to make it easier when installing the clock / sprinkler timer.
My color code for wiring, just as a reference. Your wire may be different colors.
- Red
- Yellow
- Blue
- Green
- Orange
- Purple
- Gray
- Black
- Pink