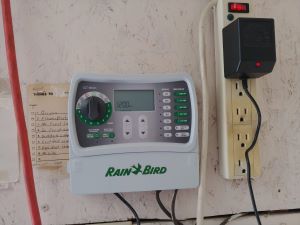
Step 1: Mounting Your Sprinkler Timer
Begin by securely mounting the new timer to the wall. Carefully follow the manufacturer's instructions provided with the timer for proper installation.

Begin by securely mounting the new timer to the wall. Carefully follow the manufacturer's instructions provided with the timer for proper installation.

Start the wiring process with the common wire, typically white and often represented by the letter 'C'. Then, connect each valve wire in order. For new installations, adhere to standard color-coding practices for irrigation wiring.

When replacing an existing timer, ensure precise color-to-zone number connections. Zone numbers are usually clearly labeled above their corresponding wire terminals.

If required, wire the power cord following the timer's instructions. Once plugged in, remove the plastic battery contact separation strip to activate the backup power source.

Carefully arrange the wires inside the timer housing to prevent damage from covers and ensure secure, long-lasting connections.

Complete the installation by assembling any remaining components, such as protective covers. Your timer is now ready for programming.
Proceed to set up your irrigation schedule for optimal lawn care.
Learn How to Program Your Timer