Pop-up with Swing Joint Example
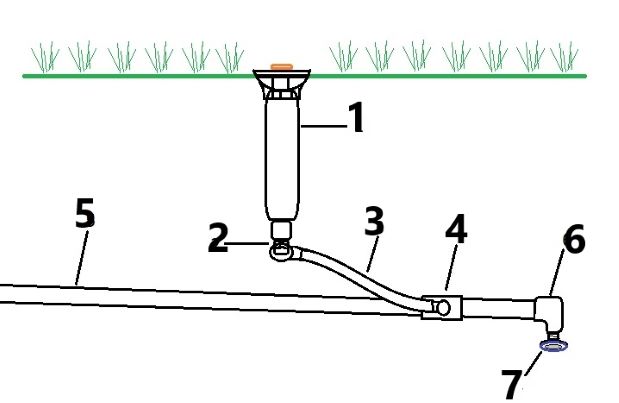
- Pop-up Sprinkler Head
- 1/2" Marlex coupled with 1/2" Funny Elbow
- Funny Pipe
- 3/4" Slip x 1/2" Thread PVC Tee coupled with 1/2" Funny Elbow
- 3/4" PVC pipe Schedule 40
- Optional 3/4" Slip x 1/2" Thread PVC Elbow
- Optional 1/2" Auto Drain (Generally only 1 installed at the lowest point of each zone)
Rotor with Swing Joint Example
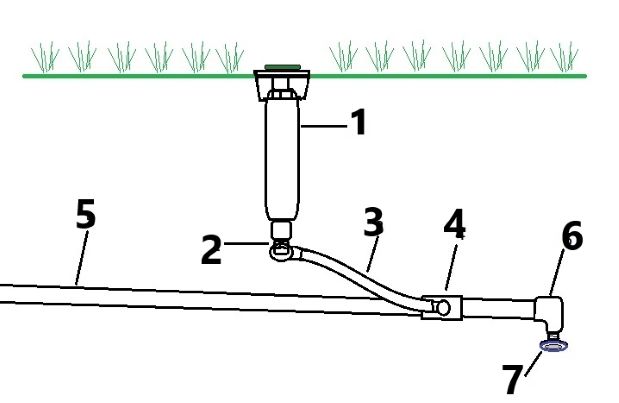
- Rotor Sprinkler Head
- 3/4" Marlex coupled with 3/4" Funny Elbow
- Funny Pipe
- 3/4" Slip x 1/2" Thread PVC Tee coupled with 3/4" Funny Elbow
- 3/4" PVC pipe Schedule 40
- Optional 3/4" Slip x 1/2" Thread PVC Elbow
- Optional 1/2" Auto Drain (Generally only 1 installed at the lowest point of each zone)
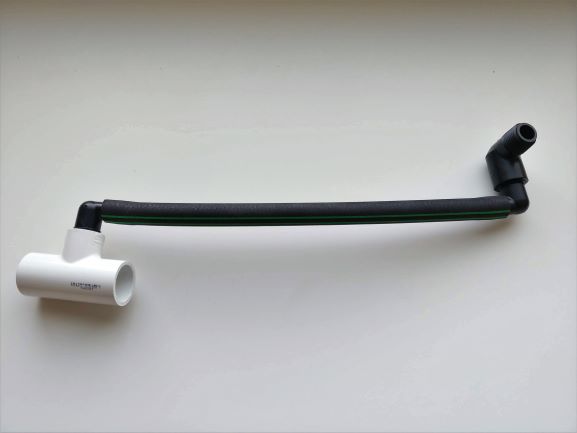
The image is of a swing joint example.
Adding sprinkler heads is quite simple in most cases, as long as the zone you are adding to has enough supply to support the sprinkler head you want to add.
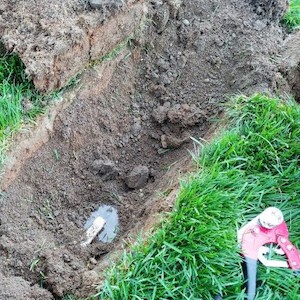
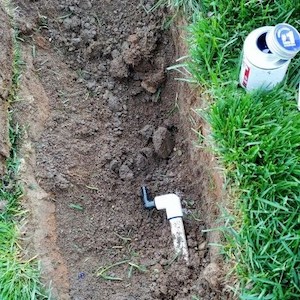
In this case, I already had a good idea where the end of this line was capped, and it was very close to where another head needed to be installed. This photo shows that I have found the end of an existing line and cut off the cap. Always allow the line to drain fully before attempting to glue on any fittings.
When gluing laterals it is I often use a glue that contains primer. Note that if you are gluing a pressurized line (such as a main line) you will need to use primer before gluing.

These images show how a swing joint is assembled. The Swing Pipe / Funny Pipe can be of any length as long as you do not exceed 3 GPM. Exceeding 3 GPM can affect sprinkler performance for distances longer than 3 feet.
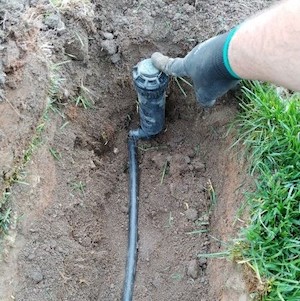
Hold the sprinkler head in place while you press dirt around it. Do your best to keep the sprinkler head straight / vertical. If the sprinkler head is not straight it will affect performance.
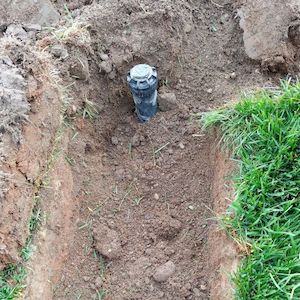
Backfill as best you can to prepare for replacing the sod.
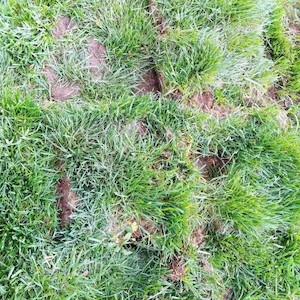
The sod will be high and uneven. Simply do your best to force the sod back to a level position. You may have to stomp or tamp the area flat.
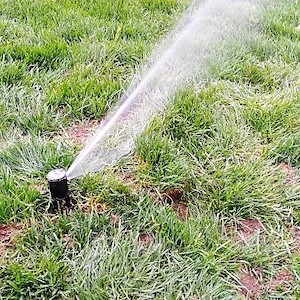
After an appropriate drying time for the glue, test the station to make sure it works properly, and that the sprinkler head is straight.